Replacing Studio 49 Type 2 Tubing
By: Margaret Swain - 8/15/2014
|
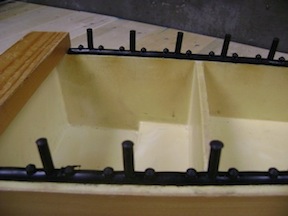
Studio 49 manufactured their Type 2 soprano and alto xylophones and metallophones from 1975 to 1991. The boxes for these instruments are made of massive spruce with woodlon (a synthetic material) on the inside. The xylophones have 2 strips of rubber covering the permanently embedded nails. Type 2 metallophones have strip tubing on the player's side and felt with nail caps on the side opposite the player. For Type 2 S/A xylophones, order part AX-05. For Type 2 S/A metallophones order part AM-05. The same part fits both soprano and alto instruments.
 The beauty of the Type 2 design is that the tubing and felt can be replaced with few tools or special equipment. The disadvantage is that over time the woodlon synthetic material can become brittle which may cause it to crack or break if bars are removed improperly. Lifting a bar from one end may cause a nail to bend so far backward that it breaks out of the instrument. Luckily these breaks can be repaired. For instructions, please see my upcoming blog post "Epoxy Repairs for Type 2 Instruments". The Type 2 design was discarded in 1992, when Studio 49 changed to manufacturing all their resonator boxes out of laminated pine wood.
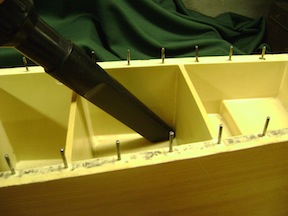
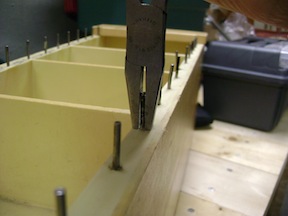
1. To begin, remove all tubing and nail covers. Just pull it off. With metallophones the existing felt may be retained or replaced depending on its condition. Next, vacuum inside the box,
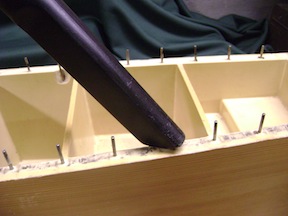
2. And over each nail. Check for cracks inside the box. If none are found proceed to step 3. If cracks or holes are present, proceed to the "Epoxy Repairs" blog post (coming soon).
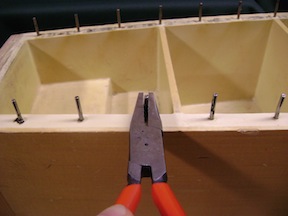
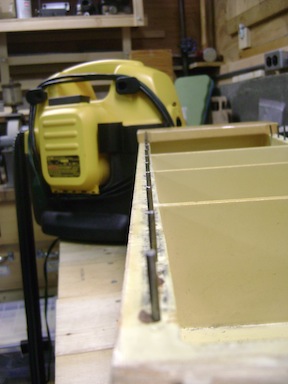
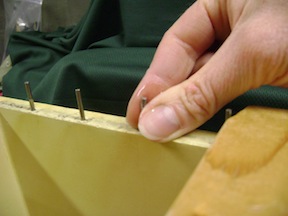
3. Nail straightening. Use blunt-nosed pliers to carefully straighten any nails that are out of alignment. I use Knipex #9161160, also known as grozing pliers. First align the nails side-to-side.
4. Then align front-to-back. Whenever possible, rotate the nail in its socket so that the straightening can be accomplished in the side-to-side plane. When aligning front to back it is possible to bend the nail too far, thus cracking the plastic insert. Use extra care, or clamp the box side between 2 blocks of wood before attempting a difficult front-to-back alignment.
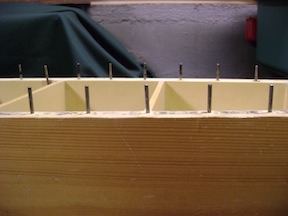
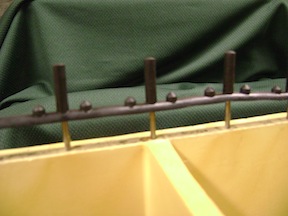
5. Viewed from the side, the nails should be reasonably perpendicular to the horizontal plane of the resonator box.
6. Viewed from the end, the nails should line up, with allowances for slight variation in how they were originally installed.
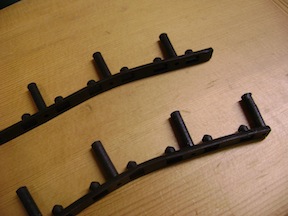
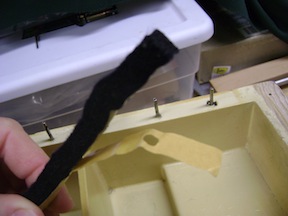
7. Take the AX-05 tubing out of its package and notice that the 2 strips are not identical. For metallophone part AM-05 you will have 1 rubber strip, one felt strip and 15 nail caps (2 more than you need).
8. Put a drop of liquid soap (dishwashing or hand soap) between your thumb and forefinger. Lubricate along the length of each nail. This will make it much easier to slide the tubing over the nails and have it seat properly.
9. Start by positioning the tubing strip over the top of each nail. Be sure to choose the correct strip for each side of box (player's side and opposite side).
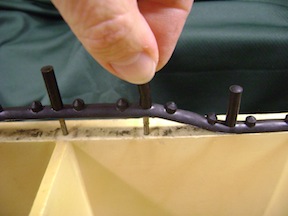
10. Then push down on the strip from above each nail using your fingers,
11. And on both sides near the base of each nail using the shaft of a small screw driver.
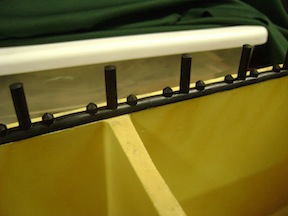
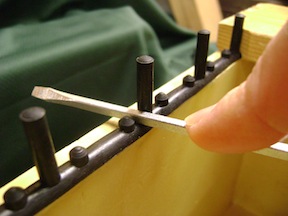
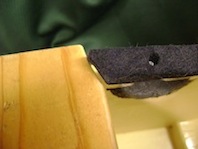
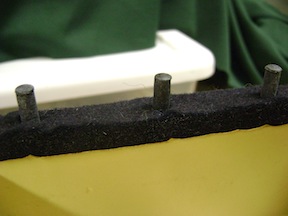
12. The finished installation should look like this. Note - there are no gaps between the tubing strip and the horizontal surface of the resonator box.
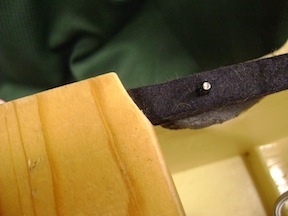
13. For metallophones, install the tubing strip as above on the side nearest the player. You may retain the existing felt strip if it is in good enough condition. To replace it, pull off the old one (often red felt), remove the adhesive backing from the new strip,
14. And press it into place.
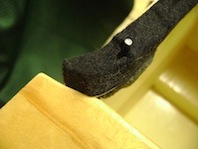 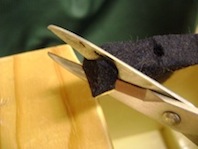  15. Occasionally, the felt is too long to fit the box and can be cut on the diagonal to match the end plate profile. Observe where it should be cut, then cut it to fit with sharp sturdy scissors. 15. Occasionally, the felt is too long to fit the box and can be cut on the diagonal to match the end plate profile. Observe where it should be cut, then cut it to fit with sharp sturdy scissors.
16. Press into place.
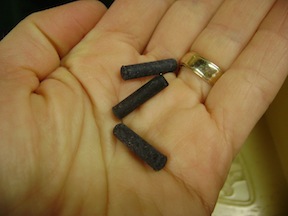
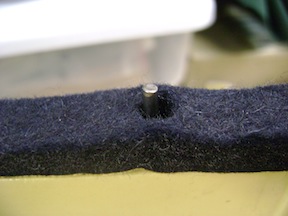
17. These are the nail caps that come in the AM-05 package.
18. Place one over each nail, pressing them all the way down, so they look like this.
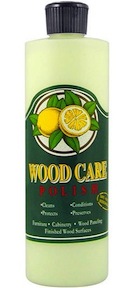 19. This may be a good time to clean the exterior of the resonator box and polish the bars. I use Wood Care Polish because is an all-natural non-toxic product which, while lightly scented with lemon oil, does not leave a lasting fragrance.
Replace the bars on the instrument. If any bars are "pinned" between 2 rubber covered nails, observe where there is extra space and using pliers, bend one of the nails very slightly to the side so the extra space is equalized between the bars. It should not be hard to remove or replace individual bars.
Enjoy the sound of your re-conditioned instrument!© 2014 19. This may be a good time to clean the exterior of the resonator box and polish the bars. I use Wood Care Polish because is an all-natural non-toxic product which, while lightly scented with lemon oil, does not leave a lasting fragrance.
Replace the bars on the instrument. If any bars are "pinned" between 2 rubber covered nails, observe where there is extra space and using pliers, bend one of the nails very slightly to the side so the extra space is equalized between the bars. It should not be hard to remove or replace individual bars.
Enjoy the sound of your re-conditioned instrument!© 2014
|
 |
| Back to Category List |
|
 Margaret Swain
I enjoy working to connect teachers to quality books and instruments for music and dance education. I hope you find my blog useful and interesting.
|
|
|
|
|
Orff Instrument Repair and Assembly (more)
Courses and Classes for Teachers (more)
Mallets (more)
Product Spotlights (more)
Orff Instruments (more)
|

|
|


