Replacing Sonor Rubber Pins (updated 9/12/19)
By: Margaret Swain - 3/20/2017
|
All Sonor xylophones and metallophones use rubber pins (ZS1 or ZS2) to mount the
tone bars onto the resonator box. Over many years of use, individual pins can break
or wear out, and will need to be replaced. Here we show 2 methods to remove the
old pins, and illustrate how to install the new ones.
The following instruments use Sonor ZS1 pins: all Meisterklasse rosewood and Palisono xylophones and
metallophones, all Primary Line xylophones and metallophones, Global Beat Sucupira
wood xylophones.
The following instruments use Sonor ZS2 pins: Global Beat fiberglass xylophones,
Global Beat metallophones.
From my work in the field, I have seen how important it is to replace broken rubber
pins with authentic Sonor parts, and to do this work with care and attention to
detail. Please do not be tempted to pound a metal nail through the center of a
broken off rubber pin. This often results in damage to the resonator box, and when
this happens you have a far more difficult problem to solve. When the rubber pins
are replaced with rubber, you extend the life of the instrument, and you protect
your investment for years to come. Please note: The process for replacing Studio 49 rubber pins is similar, but somewhat different from the Sonor pin replacement process. Please contact Margaret for details, or wait for our Studio 49 Rubber Pin replacement blog coming soon.Pin Removal Method 1: This method is for when you have at least 1/8 inch of the pin sticking out of the hole. You will need a pair of vise grip pliers. Long nose vise grip pliers work the best. Also you will need a small thin piece of metal to serve as a pry guard. Never pry on the wood of the resonator box or it will be damaged. Always begin your repair projects by wearing eye protection. Inexpensive safety glasses can be purchased at any hardware store.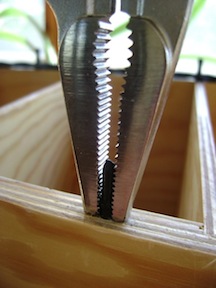
1. Set the vise grip pliers so they will tighten around the pin, but not cut through it. Use trial and error to determine the setting. Photo shows position before gripping the pin.
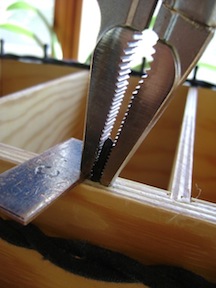
2. Grip the pin and rock the pliers to one side, then slide the pry guard under the pliers and close to the pin.
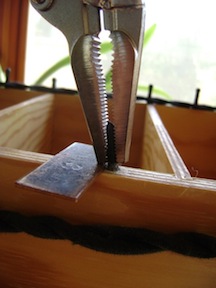
3. Rock the pliers back, with all pressure going on the pry guard, to start to budge the pin out of its hole.
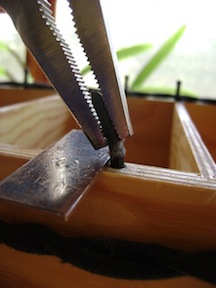
4. As pin starts to come out, re-set the vise grip pliers, and the pry guard, to repeat steps 1-3 until the pin comes all the way out. Now scroll down to Installing the New Pin.
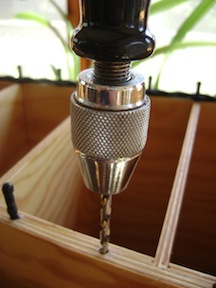
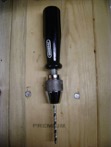 Pin Removal Method 2: This is for when the pin has broken off flush with the resonator box, or has less than 1/8 inch sticking out. For this method you need a either a hand drill or a power screw driver fitted with a drill chuck. I prefer this over a full sized power drill because it gives you more control and the ability to stop before you make a mistake. You may also want to have a pin vise for the final sizing of the hole. The Pin Vise is a handle that holds the drill bit, see picture to right. You turn it manually. Pin Removal Method 2: This is for when the pin has broken off flush with the resonator box, or has less than 1/8 inch sticking out. For this method you need a either a hand drill or a power screw driver fitted with a drill chuck. I prefer this over a full sized power drill because it gives you more control and the ability to stop before you make a mistake. You may also want to have a pin vise for the final sizing of the hole. The Pin Vise is a handle that holds the drill bit, see picture to right. You turn it manually.
1. Use a knife or single edged razor blade to cut off any remaining portion of pin. Dont cut yourself.

2. Mark the exact center of the broken pin by tapping a small nail into it, enough to make a depression. Remove the nail.
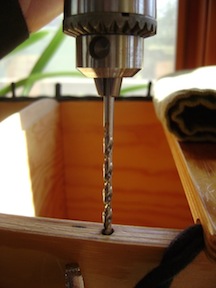
3. Fit a 9/64th inch or smaller drill bit into your drill or pin vise, and set the drill bit into the depression made above. (If you have drills numbered 1-60, use the number 30.)
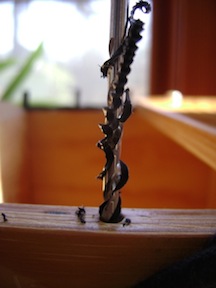
4. Rotate the drill bit clockwise a short distance into the rubber pin. Try to center the drill as accurately as you can. A thread of pulverized rubber will start coming out of the hole. Keep drilling until you reach the desired depth, or until you encounter resistance. You must drill straight down, otherwise you could put a hole through the side of the resonator box.
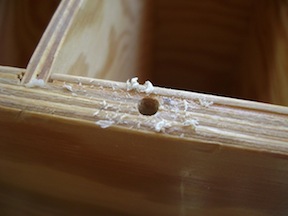
5. Remove the drill bit by continuing to turn clockwise while pulling up on the drill. Vacuum the rubber and glue bits out of the hole and remove any rubber and or sawdust from the drill bit.
Installing the New Pin: Now that you've removed the pin cleanly, you'll want to check the size
of the hole. As wood ages, it can change size, and holes can go out of round or
contract. Test the hole using a Sonor ZS1 or ZS2 pin. If you
have just removed a pin that is original to the instrument, it is likely
the hole size will need to be slightly enlarged or rounded to accept the
new pin. (See step #1.) However, if this particular pin has been replaced before, the hole
size may be just right for installing the new pin. (See step #2.)
1. For holes that need to be enlarged, first check to see if you are installing
the ZS1 or the ZS2 pin. They are not the same size.
A #18 drill bit will give the finish size for a ZS1 pin. The closest fractional
size is 11/64th.
A #23 drill bit will give the finish size for a ZS2 pin. The closest fractional
size is 5/32nd.
Choose the correct drill for the pin you are installing, and carefully enlarge the
hole.
If the hole is still too small, use the same size drill again. Human variation will
cause a little more material to come out.
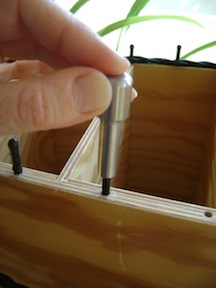
2. After vacuuming the hole, insert the new pin. This photo shows the pin insertion tool we sell that helps you install the pin for a press fit, without bending it.
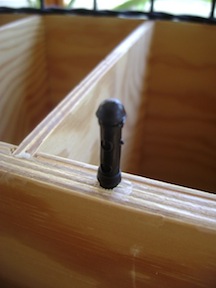
3. The new rubber pin should fit tightly and not come out when you pull up on it.
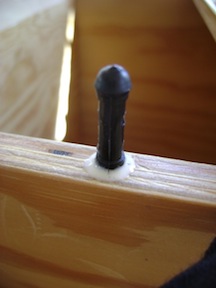
4. If the hole is too large, place a drop of wood glue in the hole and a little around the perimeter of the hole.
Additional Methods:In addition to the Sonor pin replacement methods I've described above,
there are 2 videos on YouTube that demonstrate alternative methods for accomplishing this repair. Here are
the links:
Video #1 is from Sonor.
Video #2 is from West Music.
The method you choose will depend on the tools you have available and your
comfort level in using these tools.
Be sure to use EYE PROTECTION whenever using tools.
For Sonor Meisterklasse rosewood and Palisono, Primary Line, and Global Beat Sucupira wood,
choose rubber pin ZS1.
For Sonor Global Beat Fiberglass, and Global Beat Metallophones, choose
rubber pin ZS2.
© 2017
|
 |
| Back to Category List |
|
 Margaret Swain
I enjoy working to connect teachers to quality books and instruments for music and dance education. I hope you find my blog useful and interesting.
|
|
|
|
|
Orff Instrument Repair and Assembly (more)
Courses and Classes for Teachers (more)
Mallets (more)
Product Spotlights (more)
Orff Instruments (more)
|

|
|


