Epoxy Repairs for Studio 49 Type 2 Instruments
By: Margaret Swain - 2/27/2018
|
Studio 49 manufactured their Type 2 soprano and alto xylophones and metallophones from 1975 to 1991. The boxes for these instruments are made of massive spruce with woodlon (a synthetic material) on the inside. The beauty of the Type 2 design is that the tubing and felt can be replaced with few tools or special equipment. The disadvantage is that over time the woodlon synthetic material can become brittle which may cause it to crack or break if bars are removed improperly. Lifting a bar from one end may cause a nail to bend so far backward that it breaks out of the instrument. Luckily these breaks can be repaired.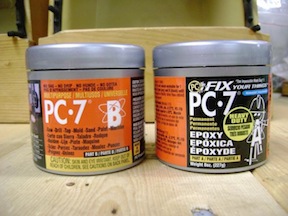 For this repair you will need: For this repair you will need:
PC-7 Epoxy
Sand paper and sanding block
Pliers
Vacuum
Scrap board and clamp for mixing epoxy
Flat and round toothpicks
Mixing sticks
T2N1 replacement nail if any are missing
Always begin your repair projects by wearing eye protection. Inexpensive safety glasses can be purchased at any hardware store. Epoxy repairs are best done outside or if indoors, only with adequate ventilation. I recommend that the following repair be done away from school, or at school on a non-student day. In either location, keep all epoxy products away from children and pets. Begin your repair by removing the old tubing, vacuuming the instrument, and aligning the nails as shown in steps 1-6 of the blog entitled "Replacing Studio 49 Type 2 Tubing". 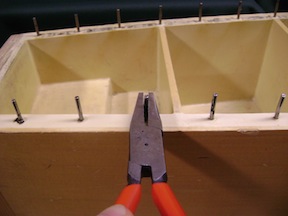
1. Here is a review of the nail straightening process. Use blunt-nosed pliers to carefully straighten any nails that are out of alignment. I use Knipex #9161160, also known as grozing pliers. First align the nails side-to-side.
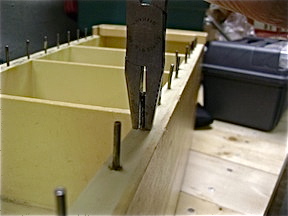
2. Then align front-to-back. Whenever possible, rotate the nail in its socket so that the straightening can be accomplished in the side-to-side plane. When aligning front to back it is possible to bend the nail too far, thus cracking the plastic insert. Use extra care, or clamp the box side between 2 blocks of wood before attempting a difficult front-to-back alignment.
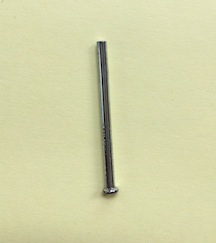
3. If any nails are missing, we offer the custom nail T2N1 which matches the length and diameter of the original xylophone nail. This end of this replacement nail has been machined smooth to protect the integrity of the AX-05 tubing that will cover it at the end of the repair.
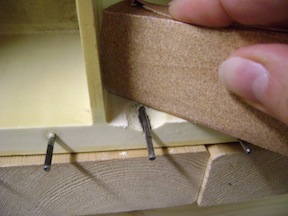
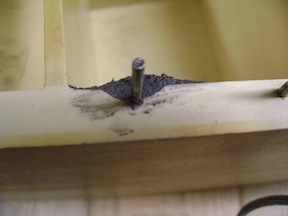
4. Lightly sand the resonator box surface surrounding the break.
5. Vacuum any dust or debris from around the hole. If the nail is loose enough to come out, hold onto it while you vacuum.
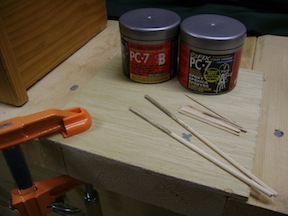
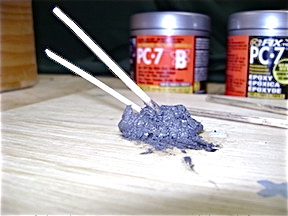
6. Purchase PC Products brand PC-7 epoxy. The 2 components "A" and "B" are sold as a set. Clamp a scrap board to your table or workbench. Obtain 2 mixing sticks (shortened barbecue skewers work well), and have both round and flat toothpicks on hand for shaping the epoxy you'll use to fill the hole.
7. Scoop out equal size portions of components "A" and "B" with your sticks. Close the lids to both jars.
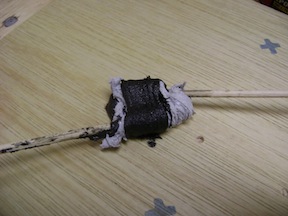
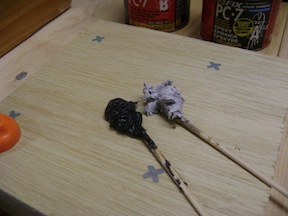
8. Mix "A" and "B" together. The components are the consistency of putty.
9. Keep mixing until the light and dark components join to form a dark gray putty. This is a slow set epoxy, so you don't have to rush.
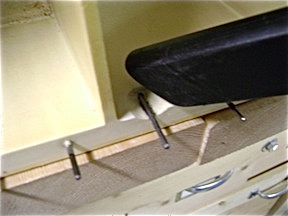
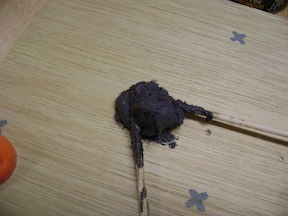
10. Place the resonator box on its side as shown. If there is space under the nail, use a toothpick to transfer a small amount of epoxy putty to the trough under the nail.
11. It's OK if the putty does not extend all the down the trough.
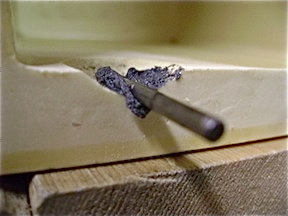
12. Press the nail into the trough.
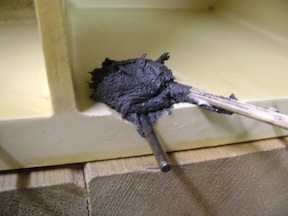
13. Now transfer a larger amount of epoxy putty to cover the nail, the hole, and the area adjacent to where the break occurred. Epoxy forms a chemical bond to the plastic interior of the resonator box, so you want the putty to extend a little beyond the hole.
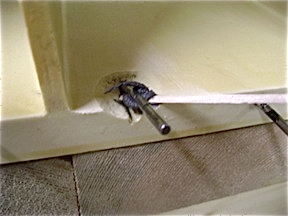
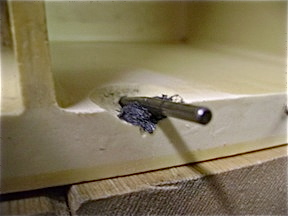
14. Using your toothpicks, start to shape the putty and remove the excess.
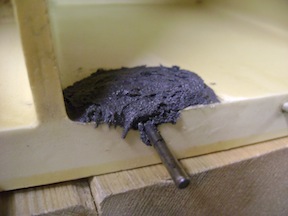
15. Mound it up a bit over the hole, to make a durable repair, but take care to smooth off the surface where the tubing will be installed. If you don't smooth this off, the tubing will not seat properly at and between the nails.
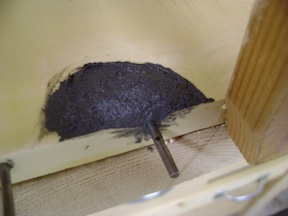
16. Also try to remove as much putty from the nail as you can. Any that remains can be scraped off after the epoxy sets as it does not adhere well to metal.
17. PC-7 Epoxy sets at the following rates depending on the temperature:
24 hours at 70 degrees F.
2-4 days at 50 degrees F.
If you leave a toothpick in the leftover putty, you can test the cure rate a day or two later. I generally let PC-7 repairs set 2 days before installing the AX-05 or AM-05 tubing on your Type 2 xylophone or metallophone. I have found these repairs to be extremely durable.
18. Once the epoxy is fully cured you may install the AX-05 tubing as described in the blog entitled "Replacing Studio 49 Type 2 Tubing". © 2018
|
 |
| Back to Category List |
|
 Margaret Swain
I enjoy working to connect teachers to quality books and instruments for music and dance education. I hope you find my blog useful and interesting.
|
|
|
|
|
Orff Instrument Repair and Assembly (more)
Courses and Classes for Teachers (more)
Mallets (more)
Product Spotlights (more)
Orff Instruments (more)
|

|
|


